How to Fix an Invald Win32 Application Error


An invalid Win32 application error is a very common computer problem encountered by so many computer users. Some people always think that the problem is caused by the operating system itselft.  Actually, the problem can be caused by many reasons. If you find the right reason, the problem is very easy to fix.


The reasons that can cause Win32 application error:

  • 1. Corrupt, bad or missing file within the application,
  • 2. The program is installed on an operating system it is not compatible with,
  • 3. It is infected by a malicious parasite such as a Virus, Trojan, worm or malware.


These errors cause programs or files not to launch properly. There are many simply ways to troubleshoot and solve invalid Win32 application errors. When you try to fix the invalid Win32 application error, following steps can be tried.


Step one: Fix the problem with a registry cleaner.

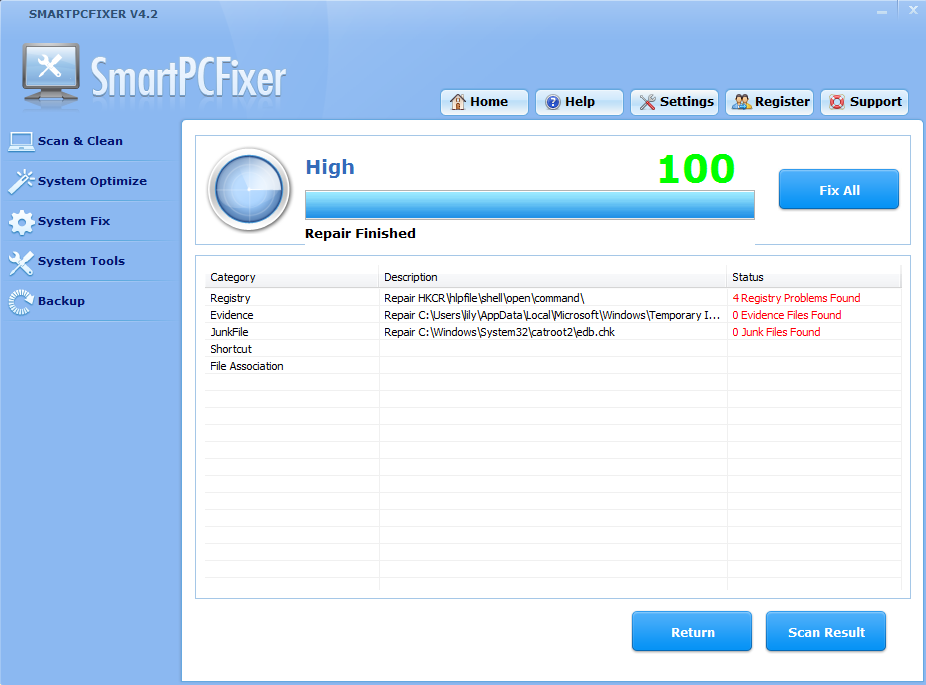
Most of the time, the problem can be caused by the registries on your PC. So the best way to fix the problem is to get a best registry cleaning software. SmartPCFixer is a good one which has helped so many users fix the win32 problems.

  • 1. Download SmartPCfixer and install it to your computer.
  • 2. Do a scanning process to discover the problems.
  • 3. Click “Repair All” button to fix the problem automatically.


Step two: Fix the problem yourself.  But you need to know much about computer operation.

  • 1. Launch your anti-virus program and perform a full-system scan to remove any malicious files that could be causing Win32 application errors.
  • 2. Launch your program after it has installed, then click the “Update” button to install the latest virus and spyware definitions. Perform a full-system scan and delete all detected malicious files.
  • 3. Run Disk Defragmentor to fix file errors. Many times, Win32 application errors can be caused when program files are scattered on your computer. When files are scattered, the programs that use them have slow launch speeds and occasionally freeze.
  • 4. Click your hard drive under “Volume” to highlight it and choose “Defragment.” The process may take a couple of hours depending on your computer use.


How to Fix TrayApp Error with SmartPCFixer


TrayApp error message is an error connected with HP software. It asks you to specify a new file path to locate the software and will not locate the software for you. This happens for a number of reasons, such as file corruption or malware. In fact , it is not difficult to fix the problem by yourself.  There are two ways to fix the problem. One is reinstalling HP software. Second is cleaning your computer with a registry cleaner tool.


The first way to fix the trayapp error is to re-install the HP imaging software program. You will need the original installation disc. Once the application is re-installed, you will no longer see the Trayapp error.


  • 1. Place the HP imaging software installation disc into your computer’s CD/DVD drive.
  • 2. Click “Start,” then “Computer.” Double-click the CD drive icon to start the re-installation process.
  • 3. Follow any onscreen instructions to complete the re-installation. Wait for the installation completion message and reboot your computer. The Trayapp error will be fixed once you have restarted your computer.


Second, scan your computer with Registry cleaner-SmartPCFixer. SmartPCFixer is good at cleaning computer junk files and registries which have caused trouble for your computer.  But with Smartpcfixer,the Trayapp problem will be eliminated very quickly. Please follow below steps:


  • 1. Download SmartPCFixer and install it to your computer.
  • 2. Do a scanning with SmartPCfixer and check for the problems.
  • 3. After scanning, fix the found problems with one click.

It is so easy to fix, right?  Smartpcfixer has helped so many people to fix trayapp problems. You don’t need to know much about computer. Every step is easy to operate.


How to Get Rid of Bad Image Error


Bad Image error is usually encountered by computer users. A bad image error is usually a good sign that you have some sort of virus or malware on your computer. It can be difficult to remove some viruses and malware, and in some cases you may need to back up your computer and reinstall the operating system. There are a few preliminary steps you can take to remove the virus.  To fix the bad image error, you only need to take a few easy steps to fix the problem.


First, please conduct a clean boot to fix the problem:


  • 1. Click Start, type “MSCONFIG” (without the quotations) in the Search Bar and Press “Enter” to start the System Configuration Utility.
  • 2. Click the “Services” tab, check the “Hide All Microsoft Services” box and click “Disable All” (if it is not gray).
  • 3. Click the “Startup” tab, click “Disable All” and click “OK“.
  • 4. Restart the computer and test the issue.


Note: Clean Boot is a troubleshooting step. If some programs have been disabled, we can re-enable them later. If you see the System Configuration Utility, check the box of “Don’t show this message” and then click “OK“.


Second, run the windows updates of your operating system.


  • Download the latest updates for your operating system from Microsoft. Open Windows Update from the Start menu and download and install all of the latest updates.
  • Restart your computer and see if the bad image error still occurs. If the error message is still there, you will need to back up your files to an external hard drive and reinstall your operating system with the restore disc that came with your computer.


Third, do a registry cleaning of your computer.


Smartpcfixer is a good registry cleaning software which dedicates to fix your computer registry problems, and will clean the operating system completely to make your computer run very fast. Please follow below steps to fix Bad Image error:

  • 1. Download Smartpcfixer to your computer.
  • 2. Do a scanning of your computer.
  • 3. Fix the discovered problems with one click.


How to Fix Code 29

This device is disabled because the firmware of the device did not give it the required resources. (Code 29)

Resolution:

Enable the device in the BIOS.


Basic Input/Output System (BIOS), also known as the system BIOS or ROM BIOS The name originated from the Basic Input Output System used in the CP/M operating system. The BIOS software is built into the PC, and is the first software run by a PC when powered on. The fundamental purposes of the BIOS are to initialize and test the system hardware components, and to load an operating system or other program from a mass memory device. The BIOS provides a consistent way for application programs and operating systems to interact with the keyboard, display, and other input/output devices. Variations in the system hardware are hidden by the BIOS from programs that use BIOS services instead of directly accessing the hardware.


Enable the device in the BIOS

Enable the device in the BIOS of the device. For information about how to make this change, you should refer to the hardware documentation or contact the hardware vendor.

So there is an easy and recommended resolution:

Smartpcfixer is one of the top ranking registry cleaners especially dedicated for fixing computer errors and optimizing system settings.
The main features:


  • Scan and Clean: This one is as its name suggests the tool to scan the registry for problems and clean them after they’re found. There’s also the Junk File Cleaner and Evidence Cleaner (for browser history, cookies etc..) which can be used to clear sensitive personal information from the computer.


  • System Optimize: This is the tool to be used for optimizing and speeding up the computer. The tool can optimize your services, desktop and startup to make your computer run faster.


  • System Fix: This can be used to scan for and diagnose non-registry related problems your pc may have. The tool can diagnose and fix problems on broken shortcuts, winsock2 problems, broken file associations, ActiveX problems etc.


  • System Tools: These supplementary set of tools include: File Splitter, Disk Defrag, BHO Manager, ActiveX Blocker, IE Management, IE Restore, IE Toolkit, Uninstall Manager and Windows Update.


  • Backup: Backing up the registry and your computer with this tool ensures you’re always safe in case you accidentally delete an important file.

How to fix Code 29 via Smartpcfixer?


Download & Install Smartpcfixer.


Click “Quick Scan” button to Scan Your Computer.

Click the “Repair All” button and then the problem will be gone completely!


How to Fix Http 404 Error

What is A 404 Error?

A 404 error indicates that your Internet Browser fails to recognize your web page. You will often see this error in the form of “404 File Not Found”. When people try to open a webpage which doesn’t exist, the server will responds with 404 Error.

Causes of Error 404:

1.A Broken link

2.Disabled webpage or changed url

How to Fix Error 404?

Although error 404 is an annoying problem, there are still chances to fix it. Before we solve the problem, you should check if the webpage address you want to open is right. Sometimes a wrong address can also result this error.

If you are not a technical guy, we recommend you use Smartpcfixer to help you fix error 404 automatically.

http://www.smartpcfixer.com/images/box.png

All you need to do is the following three steps.

STEP 1 Download Smartpcfixer & Install it. (Note: If the download link doesn’t work you may need to download it from a Download Mirror).

STEP 2 Scan Your PC for Errors.

STEP 3 Click the “Fix All” Button to Repair Your PC.

We can also provide you another method which you need to fix the error manually.

  1. Check the url carefully. Many people encounter this error just because of the wrong url.
  2. Clean the cache of your browser. This action will reset your Internet.
  3. Make sure that the page or file that you’re trying to access is physically present on your web space; more often than not, broken links occur when a file is deleted or renamed.
  4. Make sure everything in the URL is spelled correctly; many broken links come from typos while filling in the URL.
  5. Check to see if the file has been renamed; if the file was previously called “my-links-page.html,” and you later changed it to “links.html,” the link may simply be out of date.
  6. Make sure that the file has not been moved to a different directory; if it was previously in the root directory and has now been moved to a subdirectory, this will change the link.
  7. Check to make sure that the file name is not incorrectly capitalized. Some servers are case sensitive, and will not open the “links.html” if the URL specifies “Links.html,” or “links.HTML.”
  8. Make sure that your domain name is spelled correctly, and using the right extension; .com, .net, .org, and other website extensions are not interchangeable.


How to Troubleshoot the Missing Desktop Icons

Desktop Icons are used to simplify opening and using programs in Microsoft Windows. It’s convenient and easy to use for most people. However, sometimes people will encounter the situation that all the desktop icons are missing. This situation may occur on account of the Trojan or Malicious virus. In this situation, the first thing you need to do is do a complete scan with your Antivirus software.

You may wonder if this problem can be fixed. Actually you can fix it easily.

Method One: one method which is suitable for computer novices.

Smartpcfixer can help you solve this problem much more easily. Smartpcfixer is a good software which is dedicate to solving computer problems. It’s very popular in modern computer software market. Smartpcfixer™ uses a high-performance detection algorithm that will quickly identify missing and invalid references in your Windows registry. With a few easy steps Smartpcfixer™ will scan your entire Windows registry for any invalid or obsolete entries and provide a list of the registry errors found. After that you can choose to clean list items with selection or automatically repair them all.

How to Fix it with Smartpcfixer?

STEP 1 Download Smartpcfixer & Install it. (Note: If the download link doesn’t work you may need to download it from a Download Mirror).

STEP 2 Scan Your PC for Errors.

STEP 3 Click the “Fix All” Button to Repair Your PC.

Method Two:

If you are a good user of computers, you can do the following steps.

  1. Right click your mouse in the blank area of your desktop.
  2. In the pop-up dialog box, you choose “Properties”
  3. Click on the tab labeled “Desktop”
  4. Customize it. Once you have clicked the “Desktop” tab choose “Customize Desktop” which will prompt another dialog box to open. From there click on the “General” tab.
  5. Restore order. After you have clicked the “General” tab you will see a list of icons. Simply choose the icons you want restored or placed on the desktop and then click “OK.” That’s it. You have now successfully restored your desktop icons.


How to Fix an Outlook Express Error 421


So many people use Outlook in their daily life. But sometimes they always encounter a problem with Outlook. Microsoft Exchange Server administrators may need to change the server settings if users connect to the server with Outlook Express using a POP3 connection. The users will receive an error message when they try to send email to an email account on the server. The message may vary but will typically begin with “An unknown error has occurred” and specify “Server Error: 421.” The error occurs when the number that has been set for maximum inbound connections on the server is met. To resolve the problem you must increase the number of connections allowed.


To fix Outlook problem is not difficult no matter you know much about computer or not. Follow methods will tell you how to fix Outlook problems in easy ways:


Method one: Use a registry cleaner tool to fix the error code 421.


Smartpcfixer is pooular registry cleaner software which can fix all kinds of computer problem, such as windows errors, Outlook problems, Printer errors, registry problems, etc. With Smartpcfixer, you don’t need to worry about your PC any more. Please follow below simple steps to fix your Outlook problem:


  • 1. Download SmartPCFixer to your computer and install it.
  • 2. Conduct a scanning process.
  • 3. After scanning, click “Repair All” button to fix all the problems found.


Method Two: Fix the problem manually by yourself.


  • 1. Open the Microsoft Exchange Server Administrator utility. The access path to the utility will vary depending on the installation procedure used to set up your Exchange Server.
  • 2. Click the “Connections” icon in the left-side navigation pane of the Microsoft Exchange Server Administrator window for the server you want to administer. Double-click the Internet Mail Service icon in the right-side pane. This opens the Properties window.
  • 3. Click the “Connections” tab in the Properties window, then click the “Advanced” button. This opens a configuration window.
  • 4. Set the number for “Max No. of Inbound Connections” to a high number such as 100. You may need to reset it to higher values until the problem is resolved.
  • 5. Close all open Exchange Server Administrator program windows to complete the process.


How to Fix Windows Error 1083

The 1083 error is the numerical value of the error occurred. The error number is one of the value to identify the error. It holds information about the error, the possible cause of the error, the action that caused the error. Error numbers was used to address the errors in the common error code format used by windows and other windows compatible software and driver vendors. The problem is caused by certain DLL files being unregistered on your system, which prevents the Background Intelligent Transfer Service (BITS) from connecting to the update server. The 1083 error normally displays like this:

Error 1083: The executable program that this service is configured to run in does not implement the service. (0x8007043B)


The best way to fix the problem is to first register the files that Windows requires when it is being updated, and then use a registry cleaner to fix all the damaged and corrupt settings that often cause further issues to the update process.


The first thing you need to do to fix the 1083 error is to use the inbuilt “regsvr32″ command inside Windows to register qmgr.dll and qmgrproxy.dll. These two files are crucial for the update process inside Windows, and the good news is that if you can register them very easily by using the “command prompt” inside Windows. Load the command prompt and then let it register the various dll files that Windows requires, and it should fix the 1083 error for you.


On top of that, you should also clean out the “registry” of your PC with a registry cleaner. These are software programs which scan through your system and fix any of the damaged or corrupt settings that are inside your computer. The registry is where Windows stores all the settings and vital files that it requires to run, and unfortunately, it’s also the part of your computer which is continually being saved in the wrong way, causing major problems for your system. You can run Smartpcfixer to fix it automatically. Smartpcfixer is a top-ranking error-resolution registry cleaner which will fix the computer errors and optimize the system settings. You can scan, clean, optimize, and keep your PC much healthier with it!

You can download Smartpcfixer here.

http://www.smartpcfixer.com/

Just run Smartpcfixer, click ‘quick scan’

After the scan is completed, click ‘repair all’ button.


http://www.lionsea.com/

How to Fix Outlook Express Error 0x800CCC78

Like other email clients, Microsoft Outlook is prone to software errors, temporary glitches, or third-party software problems. 0x800ccc78 is one of those common Microsoft Outlook errors that may occur due to a number of reasons. Generally, the error indicates a problem with the recipient’s email address in the Reply-To field. However, as said above, it can be due to many reasons.

Open Outlook Express if it is not already opened. Click on the Tools tab and choose Accounts. When in the Internet Accounts window, click to highlight the Mail tab. Click to select your email profile and then press the Properties button. When in Properties, click on the Servers tab. Check the incoming & outgoing mail server settings. If they seem to be wrong, erase them and enter correct ones.


Verify that your account name, which is your full email address and password are typed in correctly. Typo mistakes often create such problems. Make sure that the Log on using Secure Password Authentication (SPA) box is not checked. If it is checked, click to uncheck it. Check my server requires authentication. Now hit the Settings button. Check the radio button beside Use same settings as my incoming mail server. Erase and retype your email address and password in the relevant boxes. Check the Remember password field and hit the OK button to close the Settings dialog box.


You will now return to Properties. If you want to verify whether other settings are correct or not, click the Advanced tab and look through them. Make necessary changes. When done, hit the Apply button and then OK to save and close the Properties window. Close Outlook Express and reopen it. Create a test mail and send it to yourself or any other email address.


Open your antivirus program and update it with latest virus, malware definitions. When done, run a full virus scan of your computer. Prompt the program to delete any infected file brought in the scan results. If your antivirus program did not detect any suspicious item, open your web browser and Google for free online virus scan. You can run Smartpcfixer to fix it automatically. Smartpcfixer is a top-ranking error-resolution registry cleaner which will fix the computer errors and optimize the system settings. You can scan, clean, optimize, and keep your PC much healthier with it!

You can download Smartpcfixer here.

http://www.smartpcfixer.com/

Just run Smartpcfixer, click ‘quick scan’

After the scan is completed, click ‘repair all’ button.


http://www.lionsea.com/

How to Fix Error 619 on Windows XP

The 619 error is widely seen on Windows XP when you try and connect to the Internet via a dial-up connection. Although this error states that your connection could not be maintained because of wrong username and password, the fact is that a number of different problems cause it to show. If you want to fix this error, you basically need to repair all the potential errors which are causing it to appear, which includes everything from Windows errors to potential issues with your Internet Service Provider. The error usually shows like this:

“Verifying Username & Password… Error 691: Access Denied because the username and/or password was invalid on the domain.”


The way to fix this error is actually quite simple. There are two potential errors which can cause it, having incorrect login information and registry errors. The first step to take to resolve this error is to basically ensure your login details are 100% correct. You may have either typed the details in the wrong way, or have forgotten them. To fix this, you should load up your Internet Options and then make sure that the username and password for your connection is correct. If you don’t know your login details, you should contact your administrator or domain manager to ensure that your information is correct. It’s vital that you are able to login correctly to the ISP that you have.


After that, you should then use a “registry cleaner” to fix the various problems that your computer may have inside. A registry cleaner is a powerful type of software which will basically fix a variety of problems that your system will have inside the “registry database” of your system, and is used by millions of people around the World to ensure that your computer has no problems inside it. You can download a registry cleaner from the Internet and then allow it to fix the various errors your system has by letting it scan your PC. It will remove all the problems inside, allowing Windows to run much faster and without the errors you’re seeing. You can run Smartpcfixer to fix it automatically. Smartpcfixer is a top-ranking error-resolution registry cleaner which will fix the computer errors and optimize the system settings. You can scan, clean, optimize, and keep your PC much healthier with it!

You can download Smartpcfixer here.

http://www.smartpcfixer.com/

Just run Smartpcfixer, click ‘quick scan’

After the scan is completed, click ‘repair all’ button.


http://www.lionsea.com/